This document describes how to create Linux Virtual Machine (VM) to be run on macOS or Windows Host. When followed the steps in this document, you will have CentOS 7.3 VM capable of running Netezza Linux Client, unixODBC, Python 3.6 with pyodbc and pandas among others. This setup is useful for developing Python code which needs Netezza connection.
Especially macOS users will benefit from this kind of setup, since there is no Netezza client for macOS.
This document concentrates on deploying the VM on VirtualBox, but the CentOS setup portion is identical also when using other hypervisors ie. VMWare Player, VMWare Workstation or VMWare Fusion.
Note: The LinuxVM created in this documented has all capabilities on Python 3.6. You execute python code calling python3.6 instead of just python, which points to python 2.75.
Install CentOS 7.3 on VirtualBox
- Download newest version of VirtualBox and install it: https://www.virtualbox.org/wiki/Downloads
- Once installed go to VirtualBox menu and choose “Preferences” and click “Network”.
- Click “Host-only Networks” and choose icon add:
- Now you have new “Host-only Network” which is needed for incoming connections. You can check the details by double clicking vboxnet0:
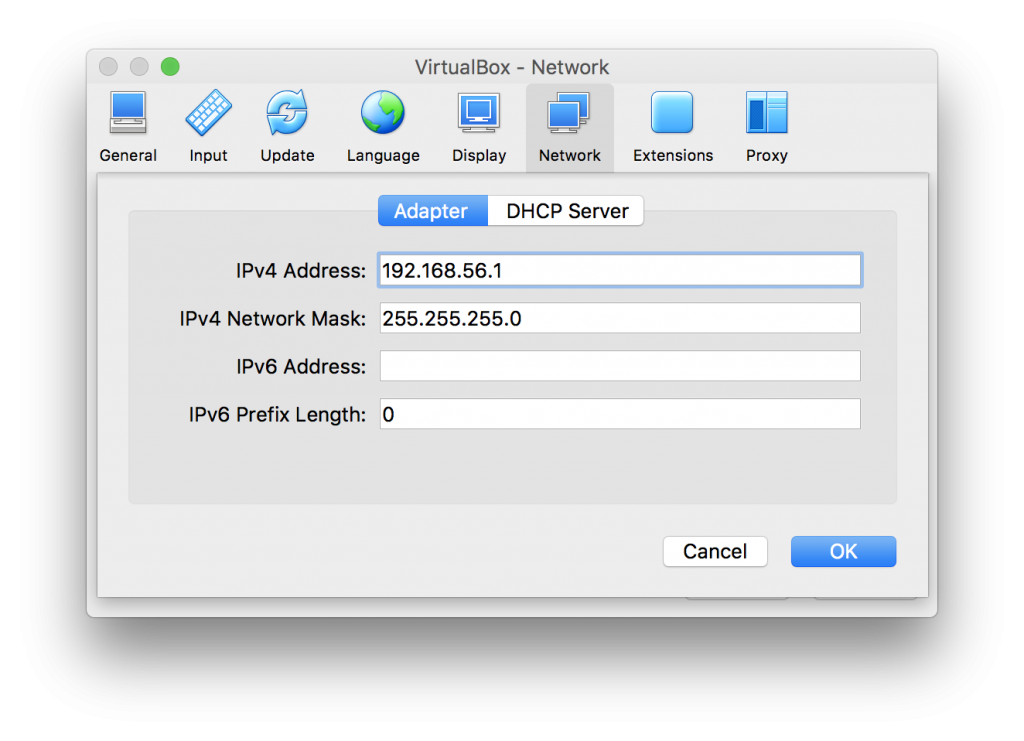
- Next create VM with two network adapters:
- Choose “New” and select “Name”, “Type” and “Version”:
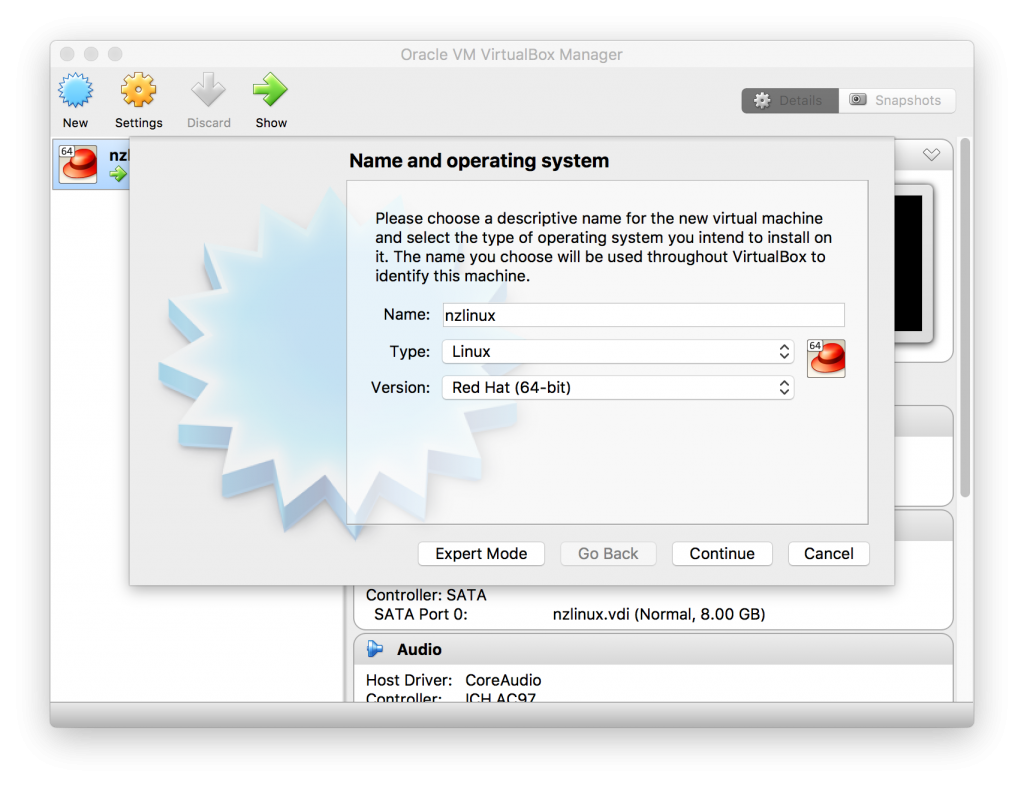
- Click continue. You can keep the memory on 1024MB which is the default.
- Click continue and choose “Create virtual hard disk now” and click “Create”.
- “Hard disk type” can be VDI, if you do not plan to run VM on other hypervisors, but if you plan to run it on VMWare hypervisor, choose VMDK. Click “Continue”.
- For flexibility choose “Dynamically allocated” and for best performance choose “Fixed size”.
- For most purposes 8.0GB is enough, but your needs may vary. Choose “Create”.
- Now VM is created, but we need to change some of the network settings:
- While new VM is highlighted, choose “Settings” and select “Network” tab.
- “Adapter 1” default settings are ok for most cases, but we need to add “Adapter 2” so click “Adapter 2”. We need 2nd Network card for incoming connections, so we select “Enable Network Adapter” and set “Attached to: Host-only Adapter”:
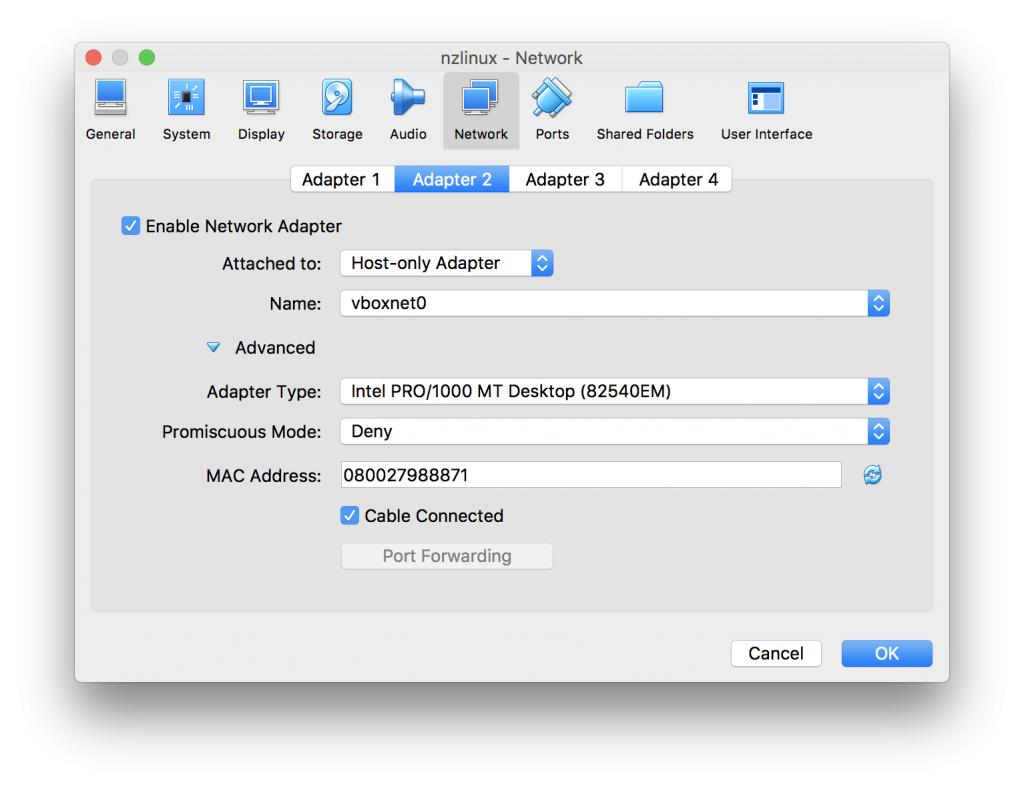
- Click “OK”.
- Choose “New” and select “Name”, “Type” and “Version”:
- We need to have CentOS minimal installation image which we can download from CentOS site: https://www.centos.org/download/
- Choose your download site and store the image to desired location. We need it only during intallation.
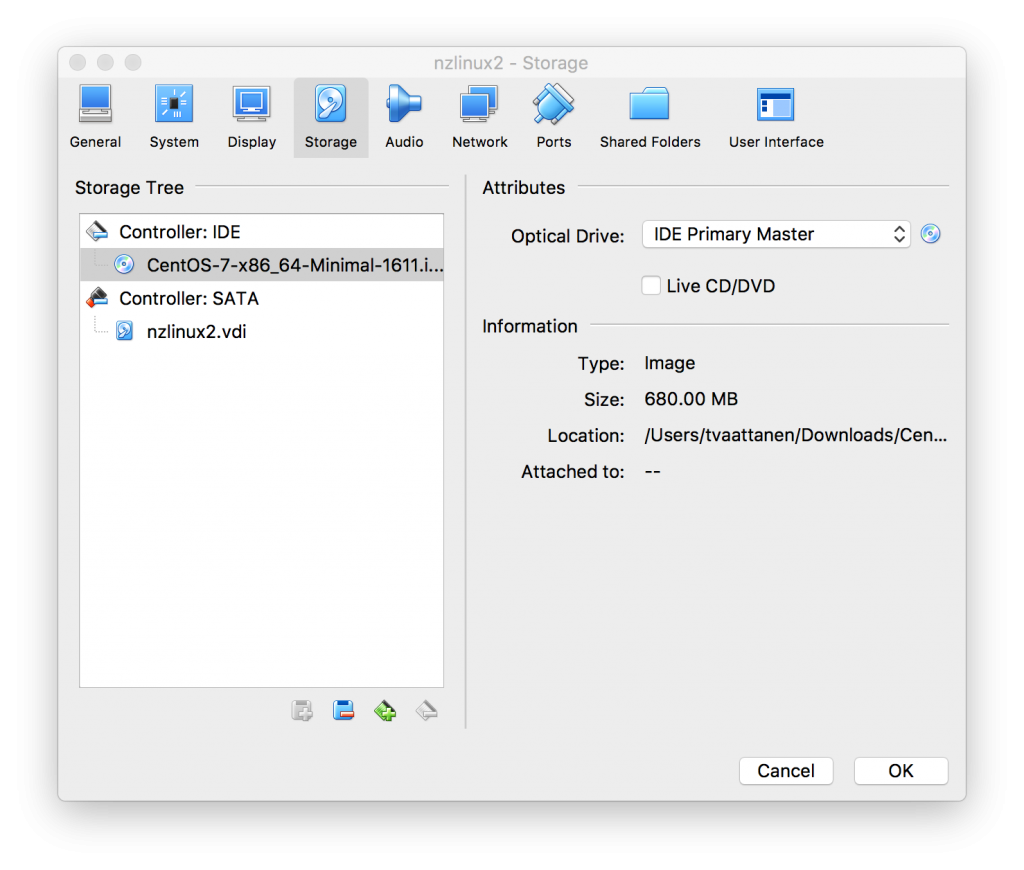
- Once downloaded, go back to VM Settings on virtual box:
- Now we can start the CentOS minimal installation. Choose “Install….” when VM has booted.
- Next we get graphical installation screen. We can keep language settings as default and click “Continue”:
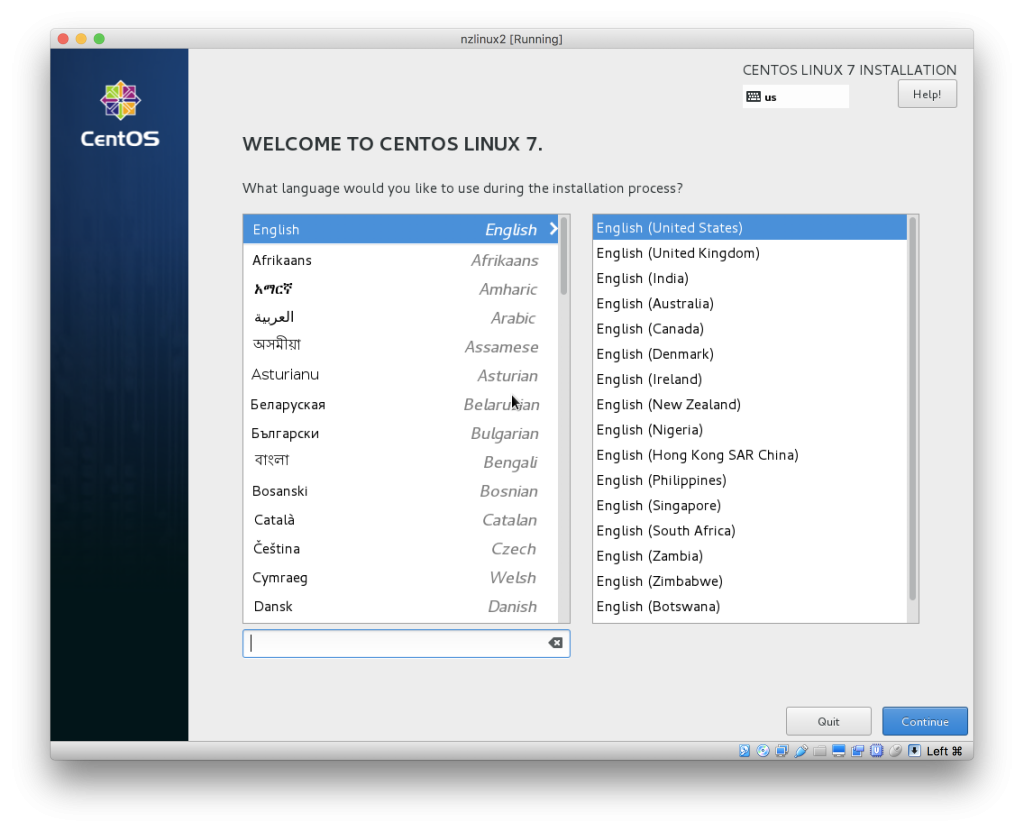
- Note when you click the VM, it will grab the mouse. To release the mouse, click left CMD (on MacOS).
- Click “Network & Host name”. You can specify your hostname as preferred.
- Both Network cards are off by default. Set them both to “ON”.
- For both Network cards, click “Configure” and on “General” tab choose “Automatically connect to this network when it is available”:
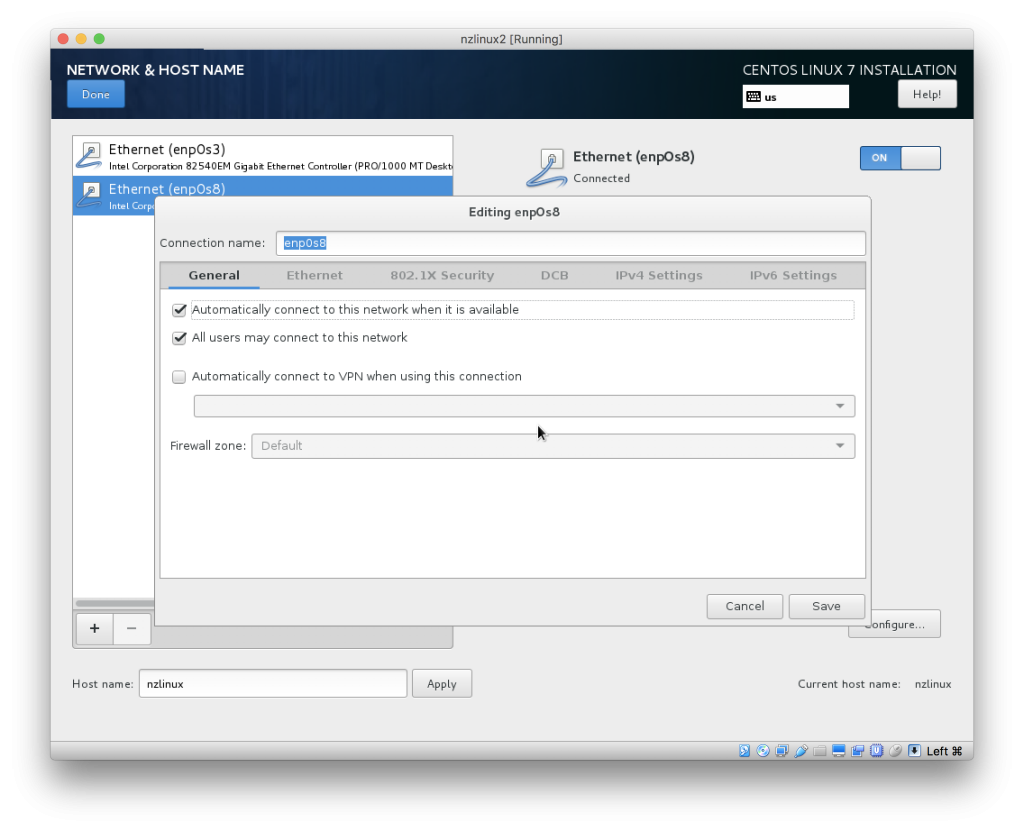
- Click “Done” to get out from Network settings, and click “Installation Destination” to confirm storage device selected by default is correct (no need to change anything). Then click “Done” to get back to main screen and you can start the installation by selecting “Begin Installation”.
- During installation set root password and select to create user. In my examples for setting up Netezza client, I have chosen to create “Netezza User” with username “nz”. I will also make this user an administrator:
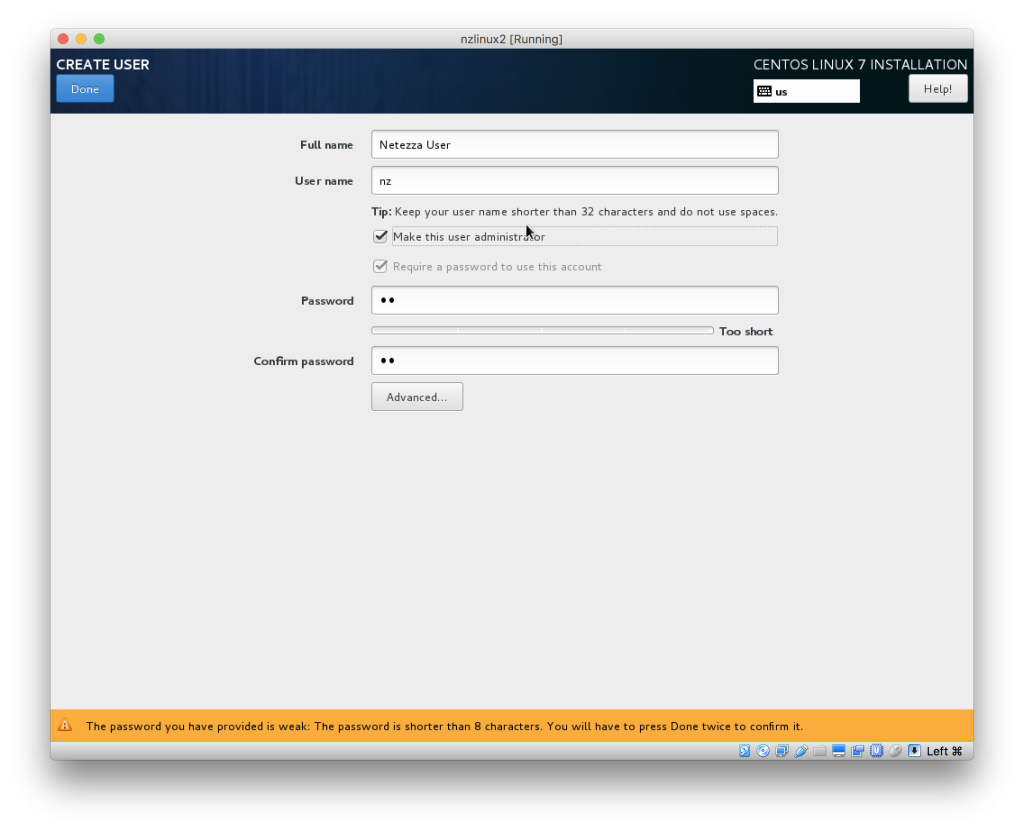
- Once installation is done you can click “Finnish configuration” and then “Reboot”.
- VM boots now first time. You can either ssh to the system (from Terminal on MacOS, or using Putty on Windows).
- If this is only VM using Host-only network on VirtualBox, it’s likely the IP is 192.168.56.101. You can check the IP for device enp0S8 with command: ip addr show when logged in through VirtualBox console.
- After installation first thing to do is to update all packages with yum update command. Either as root give command “yum -y update” or as administrative user as “sudo yum -y update”.
Configure file sharing between Host and Guest OS
You might want to be able to share, for instance your PycharmProjects folder to run Python code you developed directly on LinuxVM. That is a bit of the whole point for the LinuxVM in this case.
To achieve that, you need to enable file sharing. There is few additional steps needed I’l go through below:
- You need few additional packages first. Run following commands as root:
- yum -y update
- yum -y install gcc kernel-devel make bzip2
- reboot
- Once LinuxVM has rebooted and you have LinuxVM Window active select from menu “Devices” –> “Insert Guest Additions CD Image…” . Then log in to LinuxVM as root via VirtualBox console or ssh again and run following commands:
- mkdir /cdrom
- mount /dev/cdrom /cdrom
- /cdrom/VBoxLinuxAdditions.run
- Now select the folder you want to share from your Host OS to LinuxVM. Go to VM settings and choose “Shared Folders” tab and click icon and then choose the folder you want to share:
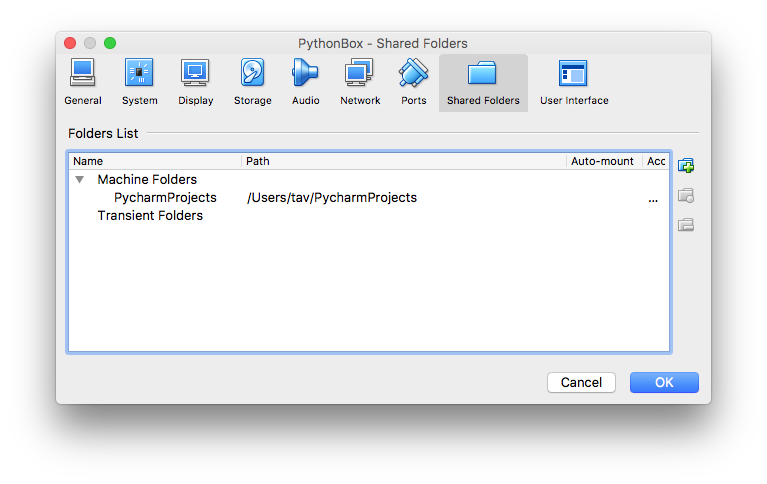
- Note: Make sure you set the mount permanent. No need for automount option, since we do it a bit differently below.

- Above we are sharing PycharmProjects folder. We want to have PycharmProjects folder mounted on LinuxVM on nz users home directory. As nz user we first create directory PycharmProjects with command: mkdir $HOME/PycharmProjects
- Then as root, we add following entry to /etc/fstab:PycharmProjects /home/nz/PycharmProjects vboxsf uid=nz,gid=nz 0 0
-
After reboot you should now have your PycharProjects folder mounted with read and write access under nz users home directory.
Note: The purpose for above share is, that when you develop your Python code with Pycharm on MacOS and if your code needs connection to Netezza, you can not run it on MacOS, since there is no Netezza drivers. Instead, when following this guide, you will be able to run you Pycharm edited code seamlessly on the LinuxVM through ssh connection, and once confirmed to work, you can commit your changes.
Install Python 3.6 with pyodbc, pandas and sqlalchemy
Log in to LinuxVM as root and run following commands:
yum -y update
yum -y install git
yum -y install yum-utils
yum -y groupinstall development
yum -y install https://centos7.iuscommunity.org/ius-release.rpm
yum -y install python36u
yum -y install python36u-pip
yum -y install python36u-devel
pip3.6 install pandas
yum -y install unixODBC-devel
pip3.6 install pyodbc
yum -y install gcc-c++
yum -y install python-devel
yum -y install telnet
yum -y install compat-libstdc++-33.i686
yum -y install zlib-1.2.7-17.el7.i686
yum -y install ncurses-libs-5.9-13.20130511.el7.i686
yum -y install libcom_err-1.42.9-9.el7.i686
yum -y install wget
yum -y install net-tools
pip3.6 install sqlalchemy
pip3.6 install psycopg2
Testing pyodbc
Edit the connection string accordingly:
[nz@nzlinux ~]$ python3.6
Python 3.6.2 (default, Jul 18 2017, 22:59:34)
[GCC 4.8.5 20150623 (Red Hat 4.8.5-11)] on linux
Type "help", "copyright", "credits" or "license" for more information.
>>> import pyodbc
>>> pyodbc.connect(server="nz", database="TEST", dsn="NZSQL", user="admin", PWD="password", autocommit=False)
<pyodbc.Connection object at 0x7f66ef8566b0>
Install Netezza Linux client
First you need to download NPS Linux client from IBM Fix Central
Then, as root run following commands (accept all defaults):
mkdir NPS
cd NPS
tar xvfz ../nz-linuxclient-v7.2.1.4-P2.tar.gz
cd linux
./unpack
cd ../linux64
./unpack
Now, log in as nz user and add following lines to $HOME/.bashrc (modify credentials and server details accordingly: NZ_USER, NZ_PASSWORD and NZ_HOST):
NZ_HOST=netezza.domain.com
NZ_DATABASE=SYSTEM
NZ_USER=admin
NZ_PASSWORD=password
export NZ_HOST NZ_DATABASE NZ_USER NZ_PASSWORD
export LD_LIBRARY_PATH=$LD_LIBRARY_PATH:/usr/local/nz/lib64
export PATH=$PATH:/usr/local/nz/bin
export ODBCINI=$HOME/.odbc.ini
export NZ_ODBC_INI_PATH=$HOME
To make above changes effective without logging out and in, you can instead run command: . ./.bashrc
Now you should be able to use nzsql:
[nz@nzlinux ~]$ nzsql
Welcome to nzsql, the IBM Netezza SQL interactive terminal.
Type:  \h for help with SQL commands
       \? for help on internal slash commands
       \g or terminate with semicolon to execute query
       \q to quit
SYSTEM.ADMIN(ADMIN)=>
Setup ODBC
Copy following two files, odbc.ini and odbcinst.ini to /etc as root:
As nz user create following symlinks:
ln -s /etc/odbcinst.ini .
ln -s /etc/odbc.ini .
ln -s /etc/odbc.ini .odbc.ini
ln -s /etc/odbcinst.ini .odbcinst.ini
Questions
If you have any questions, please connect with me.
Update
The .odbc.ini and .odbcinst.ini issues seems to be fixed with newer Python versions, so creating symlinks to users home directory nor creating system files under /etc are not anymore required. Just using .odbc.ini and .odbcinst.ini in user’s home directory works now as it is supposed to work.
 |  |  |
